|
Coming
up with the pose.
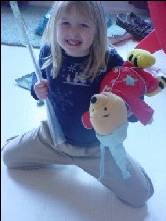
Here is a picture of one of the loves in my life, my daughter, helping me come up with the pose that I want for the sculpture |
 |
|
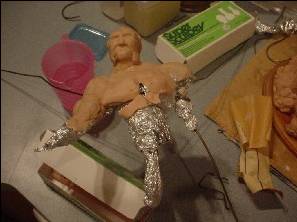
Materials used Basically the sculpture starts out with an armature. An armature is a wire frame of the sculpture. Once the sculpture is laid out with wire, I then wrap the wire with aluminum foil. Aluminum foil is used to reduce the cost of the clay. I predominantly sculpt a polymer clay called Super Sculpey. Super Sculpey has a nice feel to it and really holds details well. |
 |
|
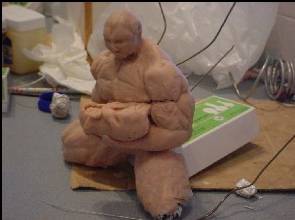
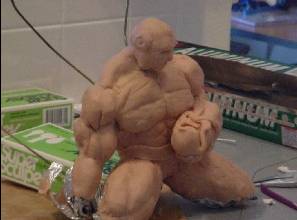
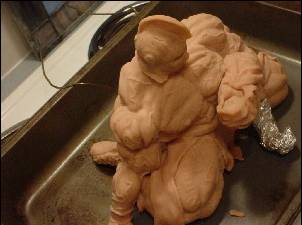
Things starting to take shape Here is
a side view of the sculpture (left side) |
 |
|
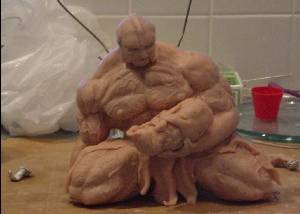
Front
view |
 |
|
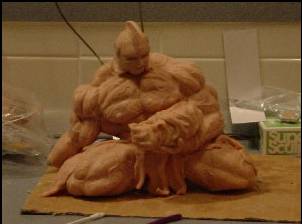
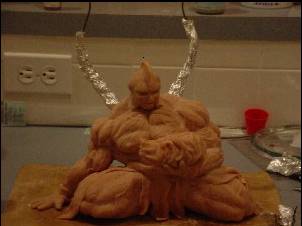
Right side view Yet another angle to view the beginning stages of the sculpture |
 |
|
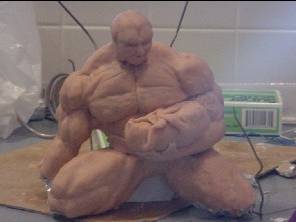
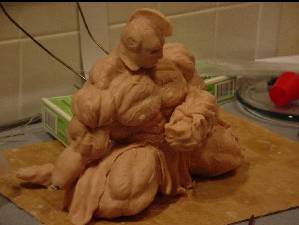
Adding detail Now for the fun part. Since the basic shape in place I now begin to work on the detail. This is my favorite part of sculpting. The details really bring the sculpture to life. |
 |
|
More detail In this picture additional detail has been applied to the baby's blanket and the angel's shoulders. |
 |
|
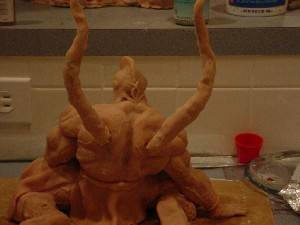
Shoulder detail The side view in this photo shows the shoulder detail. |
 |
|
Baking the sculpture The
next stage from here is to add the wings. Before I add the
wings, I will bake the sculpture to preserve the detail work that I
have been working on. |
 |
|
Starting the wings Now it is time for our Guardian Angel to start looking like an angel. I will start by wrapping the wire (for the wings) with aluminum foil. Another advantage of the aluminum foil is that sometimes the clay does not stick well to the wire. By adding aluminum foil I can easily apply the clay to my armature. |
 |
|
Working on the wings A thin layer of clay is now applied over the aluminum foil. |
 |
|
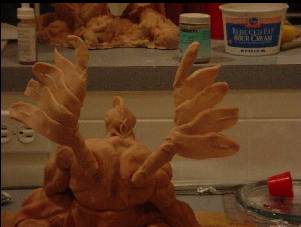
Adding feathers Each feather is individually added to the wings. A thin wire (floral wire) is inserted into the feather to allow me to manipulate the shape of the feather. |
 |
|
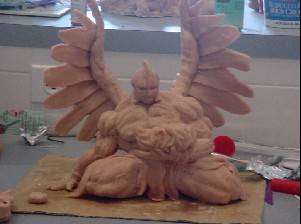
Basic wing shape Starting to look like wings now! |
 |
|
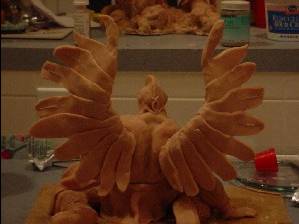
Wing detail Here I am starting to detail the wings. Again this is my favorite part. The details really change the feel of the sculpture. |
 |
|
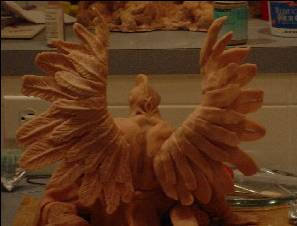
Additional wing detail Now that the back is done it is time to start working on the front. |
 |
|
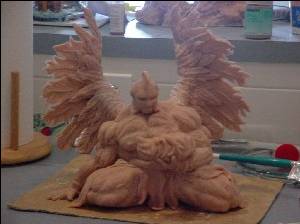
Finished sculpture Here is a picture of the finished sculpture. Additional work will be made if I decide to put this angel into production. A mold will have to be made from which individual cast will be created. Due to the complexity of this sculpture, I will most likely have to contract a master mold maker to make the mold and individual cast. The process of putting a sculpture into production is a very expensive and tedious job but well worth the expense and efforts in the end. By the time this project was finished, it took a little over 100 hours to complete this sculpture. |
 |
|
||||||||||||||||
